Ticketing System Notification Templates
In a previous article, we walked through the different ticket notifications for employees and customers and how an employee or customer can enable and trigger each notification.
In this article, we'll walk through how you can update each of those notification templates.
Below is the list of notifications and the corresponding templates:
- Notify me when a user adds a ticket -> customerTicketAddedByCustomer-Email
- Notify me when a user comments on a ticket -> customerTicketUpdatedByCustomer-Email
- Notify me when we comment on a ticket -> customerTicketUpdatedByCustomer-Email
- Note: this notification uses the same template as the previous one.
- Notify me when I am assigned to a ticket -> ticketAssignedToEmployeeNotification-EMAIL
- Notify me when an employee adds an internal comment on a ticket -> creatingTicketNoteEventEmployee-Email
Overview:
Update the Template for a Notification
In order to update the styling or display additional information in one of these notifications, follow the steps below.
- First, navigate to the Operations Portal > Templates screen

- Next, find the specific notification template you want to update (e.g. ticketAssignedToEmployeeNotification-EMAIL for the Notify me when I am assigned to a ticket notification), and navigate to the details screen

- Once in the template details screen, you can either add, update, remove information, or simply update the template styling

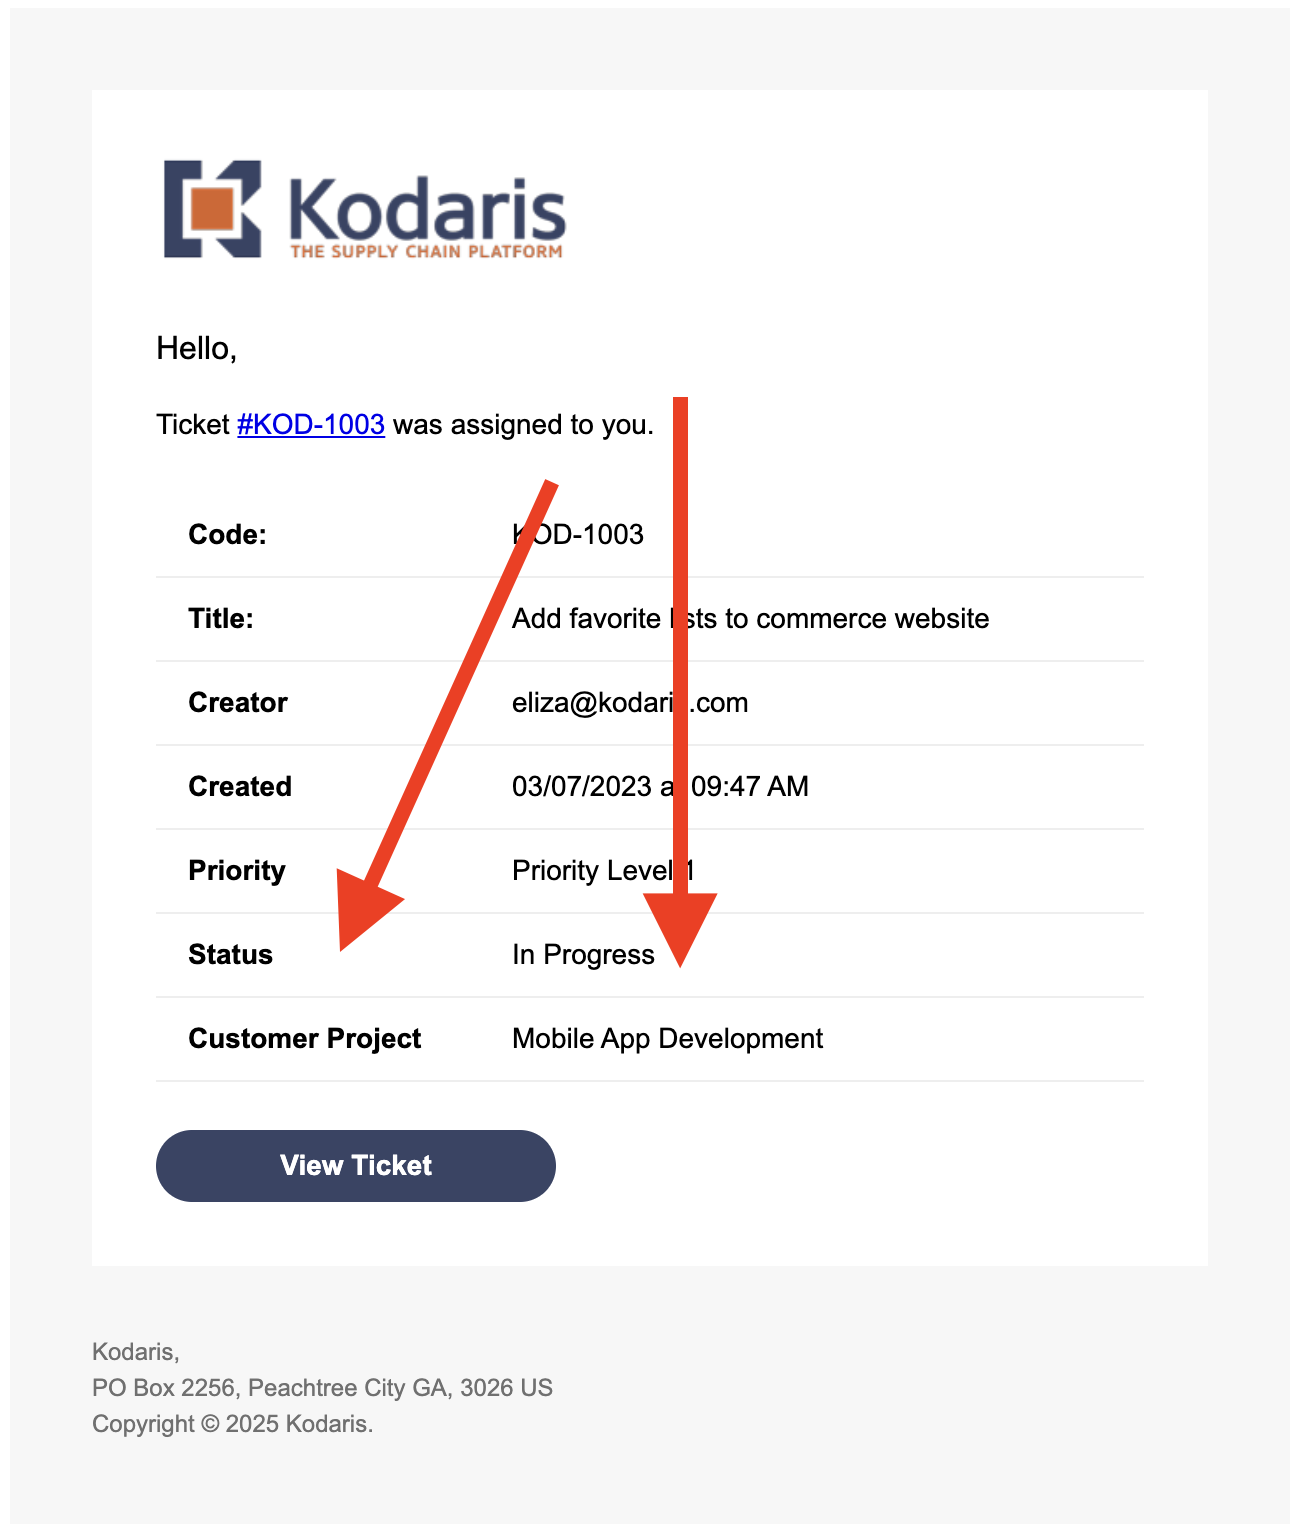
- For example, lets say you wanted to display the Customer Project for the ticket in the Notify me when I am assigned to a ticket email notification


- First, we need to find the Customer Project data to then display it in the template. In the template details, we can see that there is an entity object, and we are making a call to get the ticket record

- To see if these variables include the data we need, you can log out the objects. First, you'll want to open the Logs screen in a new window. This will allow you to see the objects you are logging.
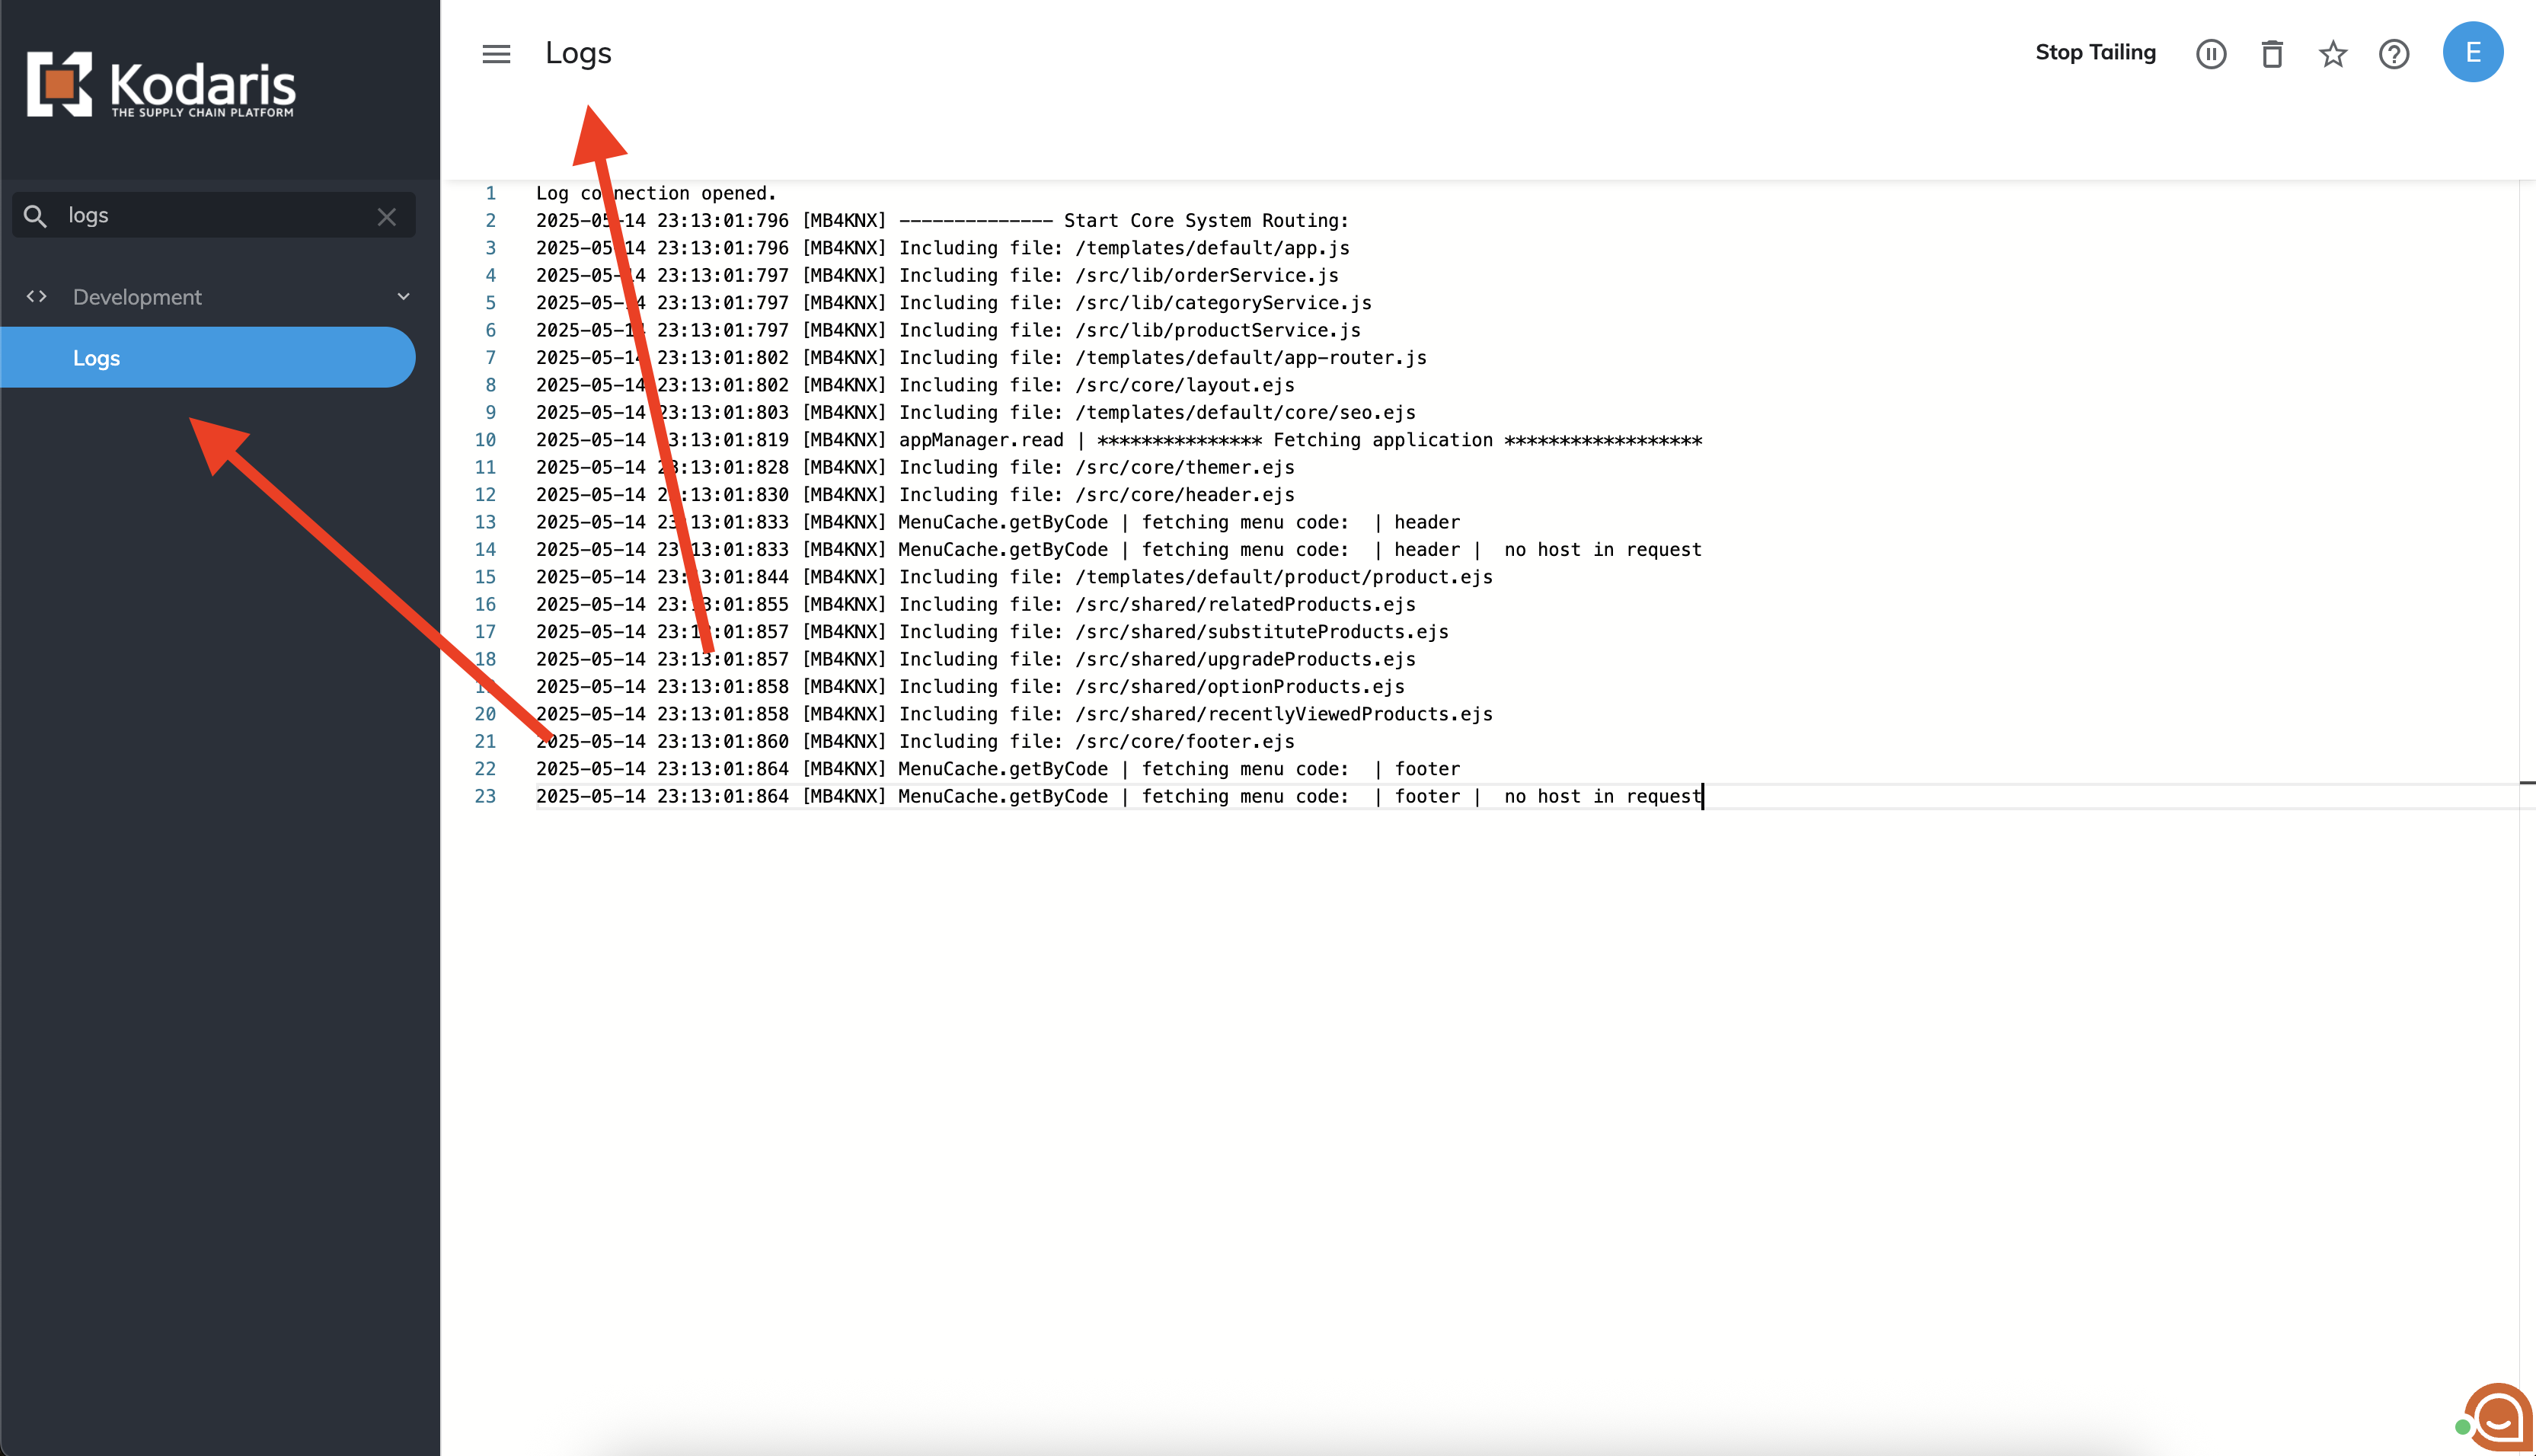
- Then, add your log lines to the template and click Save

- Now to view the data, trigger the email notification and navigate back to the Logs screen. Note: this document goes over each notification and how to trigger them

- From the log information, we can see that on the ticket object there is a customerProject field. Now that we know the field name (customerProject) and that the data exists, we can go back to the template details and add a code snippet to display the data. After adding your code snippet, click Save

- Finally, trigger the notification one more time to see the results.
Update the Subject for a Notification
You can also update the subject of the email notification if you'd like. Just navigate back to the Templates screen in the Operations Portal, filter to find the template you'd like to update, and update value in the Subject column.
And thats it!
In this article